Horse & Rider Training
How to Tie Quick-Release Knots for Horses

Halters are one of the first pieces of tack a rider reaches for, whether it's their first ride or their hundredth. That's why understanding the function and fit of your halter is an essential aspect of horsemanship.
While rope halters are traditionally a western-dominated piece of tack, they are becoming increasingly popular across a variety of disciplines. Their versatility makes them a go-to tool for training and daily use; however, using them effectively depends on proper sizing, fit, and tying techniques. There's a lot of information here, so we have organized it all into a clear and comprehensive guide to help you confidently size, fit, and tie a rope halter.
With any piece of tack we place on our equine partner, proper fit is crucial. Using a thin rope and intentionally placed knots, the halter communicates through pressure points on the horse's face. A halter that is too tight can cause discomfort or unintended nerve pressure. While one that is too loose may shift, leading to miscommunications and frustration for both horse and human.

Just like bridles and headstalls, rope halters have specific parts. Knowing each piece will be helpful when we discuss tying the rope halter, and if you need to make any adjustments.
We have created a simple step-by-step guide to help take the guesswork out of tying a rope halter! For more visual learners, we recommend watching our video on how to tie a rope halter below:
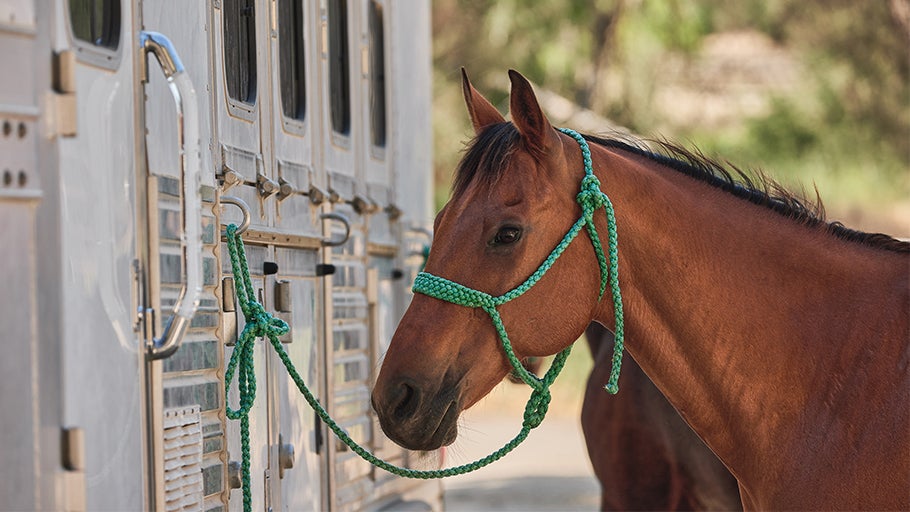
1. Secure your horse by loosely placing a lead rope around their neck to keep them from walking off during the process.
2. Position the noseband of the halter over your horse’s nose, making sure it sits about one inch (or two fingers) below the cheekbone, avoiding the more delicate parts of the nose.
3. Gently bring the crownpiece behind the ears and over your horse’s poll, being careful that the loose end doesn’t swing and hit their face.
4. Thread the end of the crownpiece through the small tie loop on the left side of the halter, at the end of the throatlatch.
5. Form a tying loop by holding the end of the crownpiece, then bend it toward the left, passing it under the tie loop to form a small new loop on the right side.
6. Feed the tail end of the crownpiece through the new loop you just created, going from left to right. Make sure the knot that you created is below the tie loop. If the knot is above the tie loop, you’ve tied it incorrectly.
7. Tighten the knot securely by pulling the tail end until the knot is firm. The tail should point down and away from your horse’s eye.


The noseband should sit about one inch or two fingers below the cheekbone, ensuring it does not sit on the weaker portion of the horse’s nose. The fiador knot should be centered and positioned just below the jaw, with about two to three fingers of space. The knot on the throatlatch should sit just behind the cheekbone without pressing directly against the throat.
The halter should be snug enough to prevent slipping but not tight enough to create rubs. To ensure comfort, run your hand under each portion of the halter; there should be enough room for your hand to pass through smoothly while maintaining contact with the rope. Finally, confirm that each corresponding knot is symmetrical on both sides of the horse’s face.
Adjusting a rope halter can be a bit more involved than the other steps. Once the halter is on your horse, take a moment to review the placement of each knot. Take note of any sections that appear too long or too short, and use the images within this article for examples of correct fit and placement.
When you are ready to make adjustments, identify the section or knot you would like to adjust. To loosen a knot, grasp the rope on either side of it and gently push toward the center of the knot. It may take a few moments to loosen the knot, especially if the rope is stiff or has been tied for a while. A gentle wiggling motion can help soften tighter knots.
Once loosened, push the knot away from the section you’d like to lengthen or toward the section you'd like to shorten. You may need to make several small adjustments to get the placement just right. When you are satisfied with the changes, firmly pull the rope on each side to secure the knot.
After making a change, recheck the overall fit of the halter. Adjusting one knot may affect the placement of the others, and additional shifts might be necessary to even everything out. Every knot on the halter, including the fiador knot, can be repositioned.
However, use caution when adjusting the fiador knot. The fiador knot is more complex than the others, and if it unravels completely, it can be challenging to retie. After adjusting this knot, it may take some additional tweaks to even out each strand. Pull each rope at the bottom to correctly position the knot before tightening it fully.
Watch the video below to visually see how to adjust a rope halter to perfectly fit your horse!
Tying a rope halter might seem straightforward, but a few common mistakes can make the process more difficult than it needs to be.
As previously mentioned, the fiador knot can be tough to piece back together in the event that it comes unraveled. To avoid this issue, always make adjustments with the halter off your horse. Take your time, make changes carefully, and then place the halter back on to check the fit.
The most frequent error occurs when the final knot is tied above the loop rather than below it. This mistake can cause the halter to either become too tight or loosen unexpectedly during use. To prevent this, ensure that the tail end of the crown piece forms a loop closer to the cheekpiece instead of doubling back toward the ears.

Cutting the excess off the crown piece is a common practice! Once the halter has been tied and adjusted, the excess is often cut off so it does not bother the horse (it also looks cleaner). To ensure that it does not fray over time, use a flame to melt the end of the rope.
Cutting the halter is a great solution, but it is a permanent alteration to the halter. If you aren’t ready to make an irreversible change or if you use this halter on multiple horses, there is another option to keep the excess from getting in the way. You can take the excess rope under the throatlatch and push it under the jaw. If the halter is correctly fitted, this will hold the excess back.
Rope halters are suitable for both training and daily use! However, they are often favored for training due to the use of pressure points. They are a fantastic choice for daily use on younger horses since they’re durable, communicative, and highly adjustable.
Rope halters are commonly used for groundwork and training due to their ability to facilitate concise communication. They can also be placed under a bridle to allow for easier handling of your horse when dismounted or to serve as a backup in the event of bridle failure, a common practice with endurance and lesson horses.
Yes, a rope halter is compatible with most snap-on bridles. Due to the adjustability, they fit very well with a variety of snap-on bridles. Rope halters also double as a reliable backup in the event of a bridle failure.

A well-fitting rope halter can make a significant difference in your horse's comfort and communication. Taking the time to adjust your halter can really improve how it functions. Although learning how to tie and adjust a rope halter may take some practice, it is well worth the effort! If you have any questions or comments, feel free to contact our friendly customer service at info@ridingwarehouse.com or by calling 1-800-620-9145. Happy riding!