Roping for Beginners
Beginner's Guide: Getting Into Team, Breakaway, & Calf Roping
Roping is an exhilarating sport that combines precision, timing, and a deep connection with your horse. Beating 3.3 seconds is how fast it’ll take to break records in the team roping world. Less than 1.66 seconds is how fast it’ll take to set a new world record in breakaway roping. However, it takes much more time than that to become a world champion! To get into roping, you’ll need patience, skilled practice, a good mount, and determination.
Learning the fundamentals of roping can be both challenging and immensely rewarding. Riding Warehouse has teamed up with sponsored rider Ronnie Garcia to create the perfect guide to roping for beginners. Here you will learn the basics of roping, how to start in various roping events, the correct tack and clothing for roping, and even some pro-tips!
Roping Dictionary
Understanding roping terminology is essential for effective communication and skill development in the sport. Knowing the correct terms helps you follow instructions accurately, enhances your ability to learn and execute techniques, and allows you to engage confidently with other ropers. It also ensures you are familiar with the equipment, techniques, and maneuvers—which is essential for learning and improving your skills. Proper terminology use enhances horse and rider safety by reducing misunderstandings, especially in high-stress situations. Ultimately, a solid grasp of roping vocabulary builds a strong foundation for your growth and success in the sport.
General Terminology
|
Flagger |
Monitors your run in the arena for any illegal catches, also known as a field judge. |
|
No Time |
Illegal catch or miss, this concludes a no time for the team. |
|
Barrier |
A rope is stretched across the roping box and tied to a rope around a calf or steer's neck. The barrier is intended to give the calf or steer a head start. The calf or steer must break the barrier before the horse and rider leave the roping box. If a barrier is broken before the allotted time, a 10-second penalty is added to the roper's overall time. An electric eye can also be used for a barrier; the same concept applies, there just is not a physical barrier. |
Team Roping Terms
|
The person who ropes the steer's horns and turns the steer left. Legal head catches are around both horns, half head, or around the neck. |
|
|
One who follows the header and steer left and then ropes both hind feet. Any heel catches behind both shoulders are legal. |
|
|
Once the rope is thrown, you wrap the rope around the saddle horn to stay tight and not let the steer go. |
|
|
Crossfire |
The header must have control of the steer's head, and the head must be bent left before the heeler can legally deliver his or her rope. In other words, the heeler may rope the steer in the switch, but not before. Any heel loop delivered before the switch is considered a crossfire and illegal. |
Breakaway Terms
|
Single-person event, ropes calf. |
|
|
A plastic, nylon, or metal honda is used when practicing or first learning how to rope. You can replace a traditional rope honda with a breakaway honda that is designed to pop off when you catch a calf. A breakaway honda is ideal for practicing since you do not have to remove your rope from the calf every time after your catch. For a beginner, since the honda pops off when there is pressure applied, a roper will not have to worry about the rope running through their hands. |
Calf Roping/Tie-Down Terms
|
Single-person event, ropes calf. |
|
|
Flanking |
The rider must lay the calf on its side before tying three of its legs together. The rider grabs the calf by the flank with their right hand and grabs their rope with their left hand. The action of grabbing the flank and laying the calf on its side is "flanking." |
|
Hooey |
The half-hitch knot used to secure the tie is called a hooey. |
|
Jerk Line |
The rope that is tied to the shank of the bit and up to the rider's belt. As the rider dismounts to proceed with flanking the calf, the jerk line comes undone and pulls back on the horse's bit as a reminder to back up. |
|
Pigging String |
A short, looped rope the roper clenches in his or her teeth during the run to tie three legs together. |
How to Start Roping
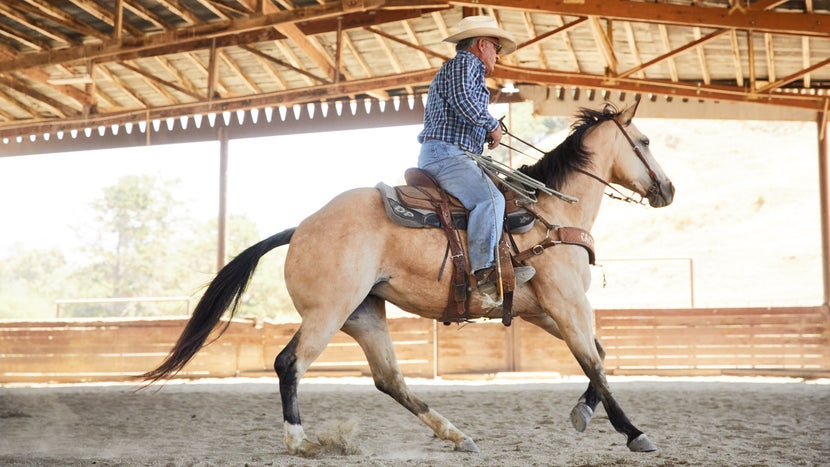
Get Comfortable on Horseback:
Before you even swing a rope, you must make sure you feel secure in the saddle. You and your equine will work as a team, and both horse and rider need to feel comfortable doing their job. The horse’s job is to watch the steer and track their movements. Your job as the rider is to follow the steer and lay your rope as needed to ensure you have a legal catch.
Choose Your Rope:
The rope needs to feel good in your hands, and every rider has their preferences when it comes to what rope feels most ideal to them. We invite you to check out our detailed how-to guide for selecting the perfect rope for more insight; this handy informational can help you find the right rope for the event you will be participating in.
Pro-Tips!
- Apply baby powder on your ropes to keep them slick and prevent them from absorbing any extra moisture to maintain the roper’s preferred “feel.”
- Keep your calf ropes powdered in a rope can to help them last longer.
Practice Roping:
Practice makes perfect when it comes to roping. To attain successful catches, you’ll need to be comfortable and confident with the rope in your hands. To get a feel for your rope, you can begin by swinging it around yourself just to feel the weight and movement. Once comfortable, roping the dummy will greatly help you develop a feel for your swing. If you have an old hay bale laying around, you can insert the Epic Animal Steer Head Dummy or Weaver Heavy-Duty Calf Dummy into the hay and use this as a mock calf to begin your practice. Roping the dummy will sharpen your skills by improving your accuracy and confidence with the rope. For some, it can be boring over time not roping a live calf—but remember, even the best of the best often go back to the dummy for practice!
Another tool to use before roping live cattle is a roping sled. A roping sled is a roping dummy that can be towed behind a four-wheeler in the arena to simulate roping live cattle. This is a great tool for a new roper, or young green horses; it’s a low-stress, safer way to learn how to track cattle and handle your rope. There’s a wide variety of roping dummy sleds on the market. They can be made at home using wood or PVC pipe with a dummy head, or you can buy a name-brand one. Some popular name-brand roping sleds are Smarty and Heel-O-Matic. In the end, a roping sled is a tool that allows you to take your time and have more control over your horse, which enables you to sharpen your rope handling skills.
Roping Events
There are three timed roping events in rodeo: team roping, breakaway roping, and tie-down roping. All three of these events begin with you and your horse in a roping chute box, then a steer or calf in the chute next to you.

Team Roping
Team roping involves two riders and two horses working together to catch one steer in the shortest amount of time. The header, who catches the steer’s horns, will be in the left side box while the heeler, who catches the steer’s hind feet, will be in the right side box. The cow has a chute between both the header and heeler.
As soon as both riders and horses are ready, and the steer or calf is looking straight ahead, the header will nod to let the chute operator know to open the gate. As soon as the gate is open and the steer is out, the barrier will break and come off. If the riders leave the chute before the barrier breaks, then it is called “broken” and a 10-second penalty is added to their overall time.
For a run to count, the header and heeler must make legal catches. A clean run occurs when a header catches around both horns, then dallys to turn left, and the heeler catches around both hind feet. For a legal head catch, the header may catch one of three ways: around both horns, half the head, or around the neck. The heeler may catch anywhere on the hind end if the rope is behind the shoulders of the steer.
Another penalty to watch out for is called a crossfire. A crossfire occurs when the header has not yet turned the steer left, or the steer hasn’t looked left, and the heeler begins to throw their rope. A crossfire will result in a “no time,” according to most roping association rules.
Breakaway Roping
Breakaway roping is an independent sport, relying on the horse and rider to work as a team. Breakaway ropers enter the box on the right side, and just as in team roping, the rider nods to signify they are ready and the chute opens for the calf. There is also a barrier in breakaway roping, and if the barrier is broken, time is added.
The goal of breakaway roping is for the rider to rope the calf around the neck in the shortest amount of time. The end of the rope being used is tied to the saddle horn with a string. Once the calf is roped around the neck, the rider will stop their horse, which causes the rope to break free from the saddle. The run is over and the clock is stopped once the rope pops off from the saddle horn. In the event that you miss the calf on the first throw, some associations allow you to re-gather your rope for a second attempt.
Calf Roping/Tie-Down Roping
Similar to breakaway, the goal of calf roping, or tie-down roping, is to rope and flank a calf in the shortest time possible. Calf ropers enter on the right side of the box and prepare for their run. The roper nods just like any other roping event, and signifies they are ready to begin their run.
When the calf leaves the chute and breaks the barrier, the horse and rider must chase it down to get the rope around the calf’s neck. Once roped, the horse comes to a halt, the rider dismounts, the jerk line breaks, and the rider runs up to the calf on-foot. It is the horse’s job to keep tension on the rope stretched between them and the calf. Once the rider is near the calf, they will flank them. If the calf is not standing when the rider goes to flank them, the rider must allow the calf to stand. When flanking, the rider will use their right hand to grab the calf by the flank and flip them onto their side. With the calf on their side, the rider grabs the pigging string with their left hand and ties three feet together. This quick action can make or break the rider’s time.
Once three legs are tied together, the rider puts both hands up in the air to signify the run is over and moves to remount their horse. Back in the saddle, the rider moves their horse toward the calf to release the tension on the rope. The calf must stay tied for six seconds. If the calf comes untied by kicking free, this will result in “no time” as the score.
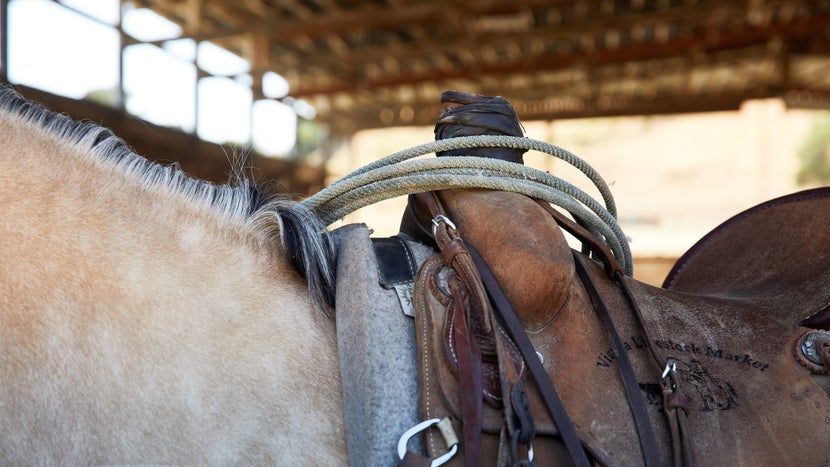
Outfitting the Roping Horse & Roper

You and your equestrian partner will need the correct tack and attire, no matter the roping event you participate in. Having the proper gear will ensure both you and your horse stay safe during practice and competition.
Outfitting the Roping Horse
Roping is a fast, intense event, so your horse should have the appropriate gear to protect them, ensuring they can have a long, healthy career.
Horse Boots: The most important piece of equipment you can use to aid in your horse’s performance are tendon boots or skid boots. Since rope horses must make fast movements and stop hard, you want to make sure their legs have support to prevent injury. Tendon boots typically have a support strap and strike pad that will help prevent tendon injuries and protect the horse from clipping itself with its hind legs. Tendon boots can be used on all four legs for complete coverage and protection. Skid boots are commonly used on the hind legs, as they are designed to protect the horse’s pastern area. Hard-stopping horses such as calf-roping and breakaway horses need hind leg protection to prevent them from “burning” their legs from stopping so hard in the arena. For additional protection, bell boots can be placed on the horse’s front feet and are made to protect the heel bulb from overreaching.
Tie-Down: A tie-down consists of a strap running from the cinch D-ring to the noseband. A tie-down gives the horse something to balance on when moving at high speed. It also encourages a lower head placement, so the roper can see the cattle when roping.
Rear/Back Cinch: The rear, or back, cinch on a roping saddle helps keep your saddle in place. Since you are putting so much pressure on the saddle horn when you have cattle roped, you need a back cinch to keep your saddle from lifting off the horse’s back.
Saddle Pad: When choosing a saddle pad, you will want to pick one that offers enough support for your horse’s back to eliminate any soreness from pulling the weight of a cow. Choosing a pad will depend on how well your saddle fits your horse and the preferred material. A wither cut-out on the pad can be helpful since it will relieve any extra pressure on the withers, especially if you are dallyed off pulling cattle. A felt pad about ½” to 1” thick works well for most horses that have a well-fitted saddle and are not sensitive to felt. You do not want an overly thick pad, as it may cause your saddle to roll. If you need help finding the right pad, check out our Western Saddle Pad Guide.
Roping Reins: A single closed set of reins is ideal for roping. They can be leather or woven material and are typically eight feet in length.
Breast Collar: A breast collar will help keep your saddle from sliding back, which is ideal when you are dallyed to the saddle horn and the weight can cause your saddle to slide. A breast collar is a personal preference; however, it is safer for you and the horse to have this piece of tack to aid in the proper placement of your saddle.
Outfitting the Roper
Every roper follows the same traditional dress code: a button-up shirt, quality jeans, nice hat, pair of durable boots, and good roping gloves.
Long Sleeve Button-Down Shirt: To properly dress, you’ll need a button-up or pearl-snap long sleeve shirt. Your shirt must be long sleeve and can be any solid color or fun pattern you may choose that best suits you!
| Shop Women's Western Long Sleeve Shirts | Shop Men's Western Long Sleeve Shirts |
Denim Riding Jeans: Boot-cut, straight, or trouser-style jeans are a staple to have. Any jeans that can fit smoothly over your boots will help keep you comfortable during your run.
| Shop Women's Riding Jeans & Denim | Shop Men's Riding Jeans & Denim |
Hats: For relaxed ropings, a basic ballcap will suffice; however, a cowboy hat will be required when at a sanctioned event.
Cowboy Boots: For your feet, you’ll need a durable pair of boots. The shape and design is a matter of preference, allowing you to show off your personal style. Take a look at our ultimate cowboy boot guide for more details!
| Shop Women's Cowboy Boots | Shop Men's Cowboy Boots |
Roping Gloves: No matter the event, you’ll need a roping glove. This glove is worn on your right hand, which is used to throw the rope. Each glove brand will vary in style, allowing you to select a glove that feels best on your hand.
Closing Thoughts

As you embark on your journey to mastering the basics of roping, remember that practice, patience, and persistence are key to improving in this dynamic sport. With a solid understanding of techniques, equipment, and terminology, you're well on your way to becoming a proficient roper. A clean run with a fast time is everyone’s goal, but the ultimate achievement is having fun. Keep refining your technique, and seek advice from experienced ropers; most importantly, enjoy the journey! If you have any questions or need further assistance, don't hesitate to reach out to our customer service team at 1-800-620-9145 or info@ridingwarehouse.com for help. Happy roping!
Related Articles:

