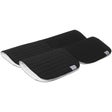
How to Apply a Standing Wrap
The Ins and Outs of Standing Wraps, Poultice, and More!
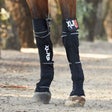
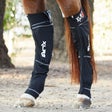
We've all seen horses wearing wraps on their legs. Whether it's for protection while riding or medicinal care, using the correct wrapping technique is crucial. In this article, the Riding Warehouse Crew explains how to correctly apply a standing wrap, also called a stable wrap or stable bandage. We've included a helpful video below as well as step-by-step instructions.
Why Do We Use Standing Wraps?
Standing wraps are commonly used on horses both as a preventative and remedial treatment. Preventative uses would include applying these wraps post-work since the compression of the wraps can prevent swelling and edema from accumulating in the leg. Wraps can also be applied to horses standing for an extended period of time (for traveling or due to an injury), as their legs are prone to gather fluid, which can make them uncomfortable. The compression works to prevent swelling and keep horses comfortable while they stand. If your horse already has swelling or edema in their leg, remedial wrapping can reduce the effect and help the horse heal.
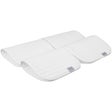
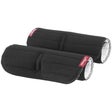
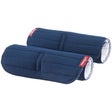
Pre-Wrap Your Wraps
Every equestrian has done it: You've just applied a perfect standing wrap and now you're inches away from Velcroing; however, the Velcro is on the inside and now you have to start all over again.
It is annoying for you and for your horse to re-wrap again and again, so making sure that your wraps are rolled correctly can save you time, energy, and effort. The steps below for rolling wraps and bandages are simple, but direction is key. Always roll toward the Velcro! Also, try to keep the roll tight; the tighter you pre-roll your wraps, the easier it will be to keep it snug when using the wrap on the horse.

Step 2 of Pre-Wrapping Your Wraps

Step 3 of Pre-Wrapping Your Wraps
Step 1 (optional): For standing wraps, tie the non-Velcro end to something secure. This allows you to apply tension and keep the roll tight.
Step 2: Take the end with Velcro and connect the hooks to the loops.
Step 3: Roll toward the Velcro while keeping the wrap tight.
|
Pro Tip: Holding the wrap horizontally (like a hamburger) helps keep the wrap even and tight. |
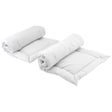
Step 4: Roll until you reach the end of your wrap.
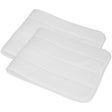
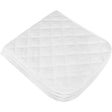
Step 5: For the pillows, determine which side is the inside and which is the outside.
Step 6: Roll the pillow inside out, so that when you apply the pillow, the inside is touching the horse.

Step 5 of Pre-Wrapping Your Wraps

Step 3 of Applying the Wrap to the Horse
Applying the Wrap to the Horse
Step 1: Pre-wrap your wraps (see steps above).
Step 2: Begin to wrap the pillow by unpeeling the end slightly. Have the rolled portion facing you so that the back of the pillow is flat against the horse.
Step 3: Place the peeled portion of the pillow across the front of the horse's leg and hold the front with your hand to keep it in place.
| Pro Tip: The top of the pillow should be placed below the knee or hock and the bottom should be near the top of the fetlock joint. |
Step 4: To keep the pillow tight against the leg, apply pressure when the pillow comes across the front of the leg (across the cannon bone) and travels back toward the legs.
Step 5: Finish wrapping the pillow around the horse's leg and avoid leaving any wrinkles.
Step 6: Grab your standing wrap and orient it the same way you had your pillow, slightly unpeeled with the excess on your side.

Step 7 of Applying the Wrap to the Horse

Step 10 of Applying the Wrap to the Horse
Step 7: To begin, slightly unpeel the end of the pillow wrap and place your standing wrap in the middle of the cannon bone. Tuck the end of the standing wrap into the pillow so that it stays secure as you wrap. Once tucked, release the pillow and hold the front of the wrap to keep everything in place. Begin wrapping down the leg.
Step 8: Once you make a full rotation around the leg, begin applying more pressure, pulling the wrap back across the front of the cannon bone.
|
Caution! If the wrap is tightened as it passes over the back of the leg, it forces the tendons to stretch inward, which can lead to a bowed tendon post-wrapping. |
Step 9: Don't pull, but keep the pressure even as you travel across the back of the horse's leg.
Step 10: With each rotation, travel down toward the fetlock joint until there's about a half-inch of pillow showing. Try to keep your rotations as even as possible with regard to spacing. Depending on the length of your wraps, you can have between 1/2" and 1" of spacing between each rotation.

Step 11 of Applying the Wrap to the Horse: Showing the "V" shape made by the wrap as it transitions to traveling back up the horse's leg toward the knee or hock
Step 11: When there is 1/2" of pillow showing, begin traveling back up the leg. Some equestrians may "cup" the back of the fetlock to provide extra support. Either way, the first rotation upward should cross in the middle of the wrap and make a "V" shape.
| Pro Tip: Leave a V shape in the wrap as close to the middle as possible! |
Step 12: Maintain the same pressure application pattern as you work your way toward the knee or hock, applying even pressure across the cannon bone. Aim to keep your rotations consistent with regard to spacing. Avoid wrinkles, as they will place uneven pressure on the leg.
Step 13: Once there is half an inch of pillow left at the top, you'll either be close enough to the end of the wrap that you can stay at the top and Velcro or start traveling back toward the middle of the cannon bone and Velcro when applicable.
| Pro Tip: Ideally, the Velcro should be on the front or the outside of the leg. |
Step 14: Check the tightness of your wrap by inserting two fingers into the top and the bottom of the wrap. You want it to be snug, but not so tight that you struggle to insert or remove your fingers.
Step 15: If your horse tries to take off their wraps, you can spray the wraps with bitter, anti-chew products.

Step 14 of Applying the Wrap to the Horse

Step 14 of Applying the Wrap to the Horse
Poultice & Liniment
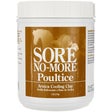
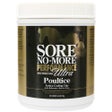
Poultice
Using standing wraps after strenuous work is a helpful way to prevent swelling before it occurs. Well-loved by many equestrians, poultice can be used in conjunction with wrapping. A poultice is applied before the wrap, going directly on the horse's leg. The clay substance is used to draw heat out of the horse's leg while the accompanying wrap keeps edema at bay. When using a poultice, make sure to put paper towels or saran wrap between the poultice and the wraps; otherwise, the wraps will get more benefits than the horse's leg!
Always be sure to check product instructions to guarantee that your poultice is safe to use how you intend to. To learn more, watch our helpful how-to video with Sponsored Rider Krista Williams as she goes over the ins and outs of wrapping with poultice!


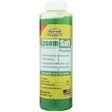

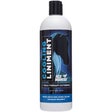
Liniment
Similar to a poultice, liniment is a great tool to use in conjunction with wrapping and can help increase circulation and relieve tense muscles. Liniment is preferred by some equestrians because it comes in various consistencies. Gel liniments are used in hard-to-reach places and will stay put for long-lasting effects. They can be used in conjunction with stable wraps, making them a great all-around option. Liquid liniments are equally useful but are intended for the larger parts of the horse's body. Concentrates can be added to a bath bucket for an all-over treatment, or sprayed on the target areas. Again, always be sure to check product instructions to guarantee that these liniments are safe to use how you intend to.


When Not to Wrap
Wrapping your horse is a helpful tool, but there are rules for when you should and should not wrap. Horse's legs are very sensitive to heat, and wraps hold heat very well. Because of this, you should not wrap your horse's legs if it is hot out. This includes hot trailer rides and hot days in general. Judging the heat is something that depends on your location and your horse's personal habits. Ninety degrees in Washington state is different from ninety degrees in Arizona. A good rule of thumb is if you're hot, so is your horse.
When there is too much heat on the horse's leg, their soft tissue is at risk for potentially irreparable damage. So depending on the situation, use wrapping alternatives such as cold hosing, icing, and hand walking to prevent swelling and increased edema.
Frequently Asked Questions
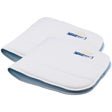
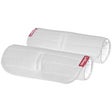
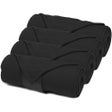
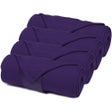
Q: What kind of pillow wraps do I need for my horse?
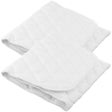
A: There are a few options for the padding portion of standing wraps. "No-Bows" are a foam wrap that has vertical stitching throughout the wrap. "Quilted" pillow wraps have padding made out of cotton and commonly have a flannel underside. Quilted pillows often provide more padding and thus are more forgiving when wrapping. No-Bows offer less padding and are easier to wrap too tightly, increasing the risk of bowed tendons (despite the name). Starting and getting comfortable with quilted pillows is a great idea!
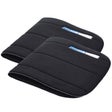


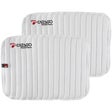


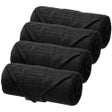
Q: What size of pillow wrap do I need for my horse?
A: Common sizes include 12", 14", and 16" for pillows. Here is a guide for a general fit, but it's always a good idea to measure your horse before you place an order.
| Horse Size | Front Wrap Size | Hind Wrap Size |
| Pony/Small Horse | 12" | 14" |
| Average Horse | 14" | 16" |
| Oversized Horse | 16" | 16" or larger |
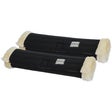
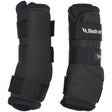
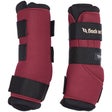
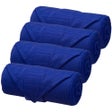
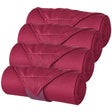
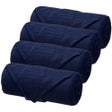
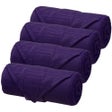
Q: Are there different types of standing wraps? Which kind should I have for my horse?
A: There are different materials used for standing wraps. Some are made with elastic for stretch while others have little to no stretch, like flannel wraps. For beginners, using less stretchy materials helps to prevent a too-tight wrap.


Q: Are there other uses for standing wraps with horses?
A: In addition to common uses, such as trailering, post-ride care, and remedial care, stable bandages can be used for medical purposes to protect leg wounds or even to support other bandages, like hock bandages. You should always wrap a horse in pairs (both front legs, both back legs, or all four) so that a horse doesn't favor the unwrapped leg and create a new problem.

Closing Thoughts
Wrapping is one of the most important skills to know if you are involved with horses. It is helpful to take the time to learn and practice this skill, so when the time comes to use it, you can be confident. Correct technique is the difference between beneficial wrapping and creating more problems. Because of this, we hope we have provided you with the tips and tools you need to learn this vital skill. As with many other horse management topics, it is always a good idea to do some practice and have your work checked by a trusted trainer or barn buddy. If you have any questions regarding products or want to learn more, please reach out to our friendly customer service at info@ridingwarehouse.com or at 1-800-620-9145. Happy riding!